Deploying on Azure: Step-by-step deployment
Step-by-step deployment
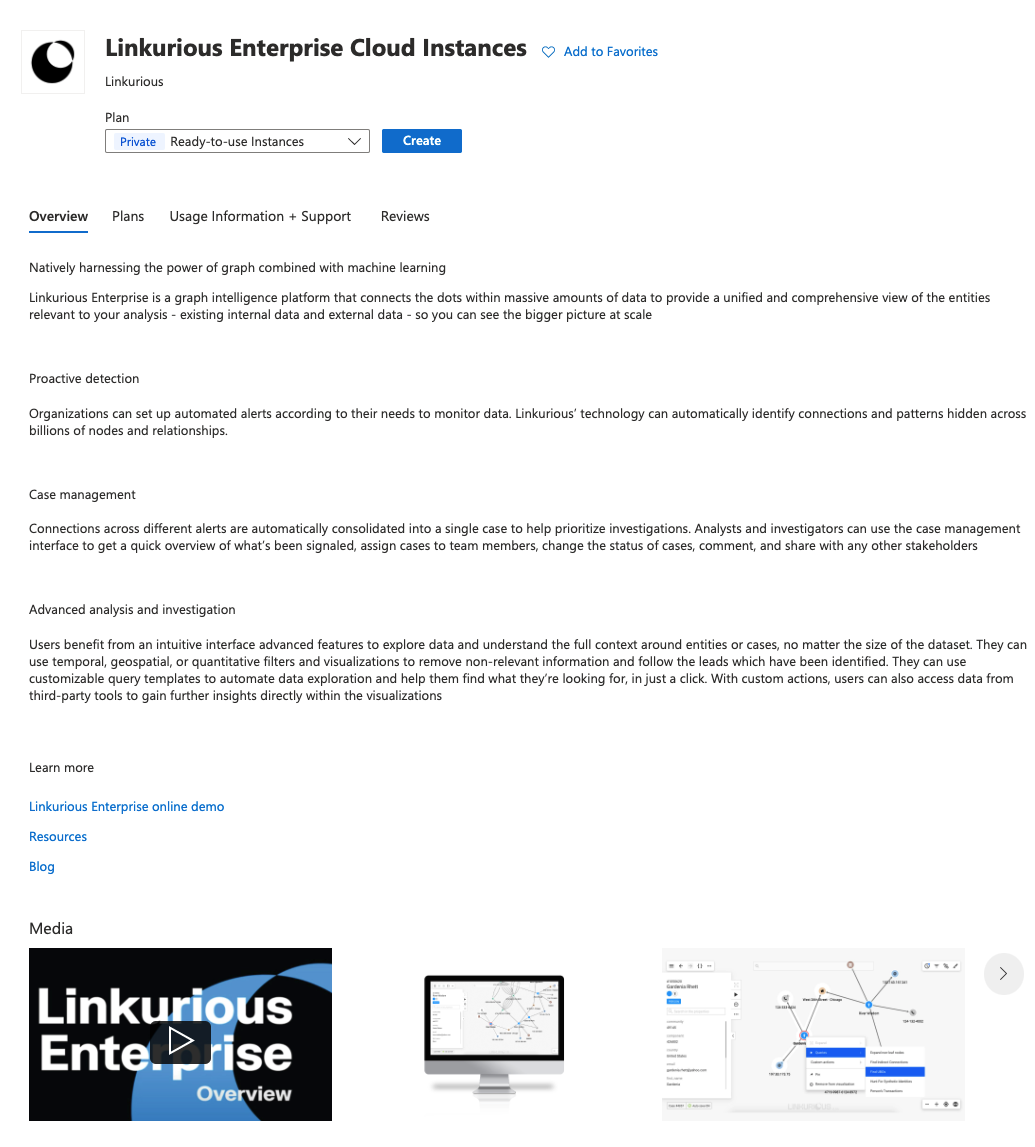
To deploy Linkurious Enterprise, you start by clicking on the Create button on the Linkurious Enterprise product page.
This will open an interactive multi-step prompt to configure and deploy an instance.
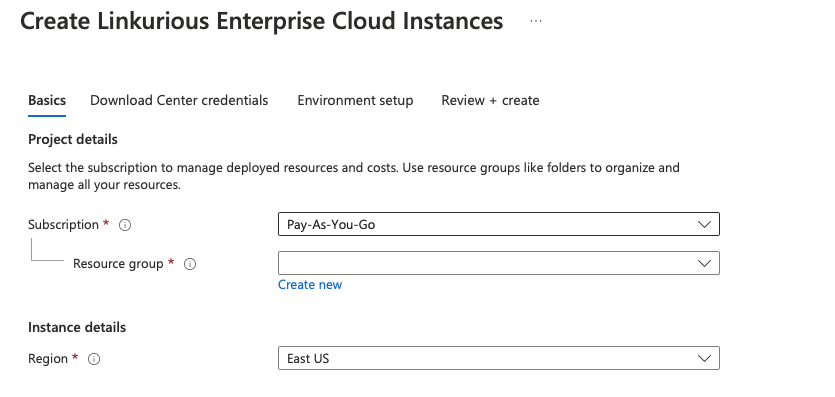
Step 1: Basics
This first step allows you to select a subscription, a resource group and a region.
The subscription is the link between your billing strategy on Azure, and the resources you will consume through the deployment of Linkurious Enterprise.
The resource group is the namespace for all resources that will be created by the deployment of Linkurious Enterprise.
The region is the location where your resources will be deployed.
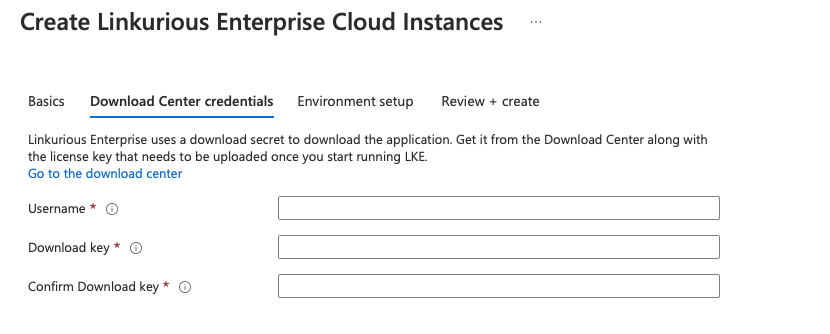
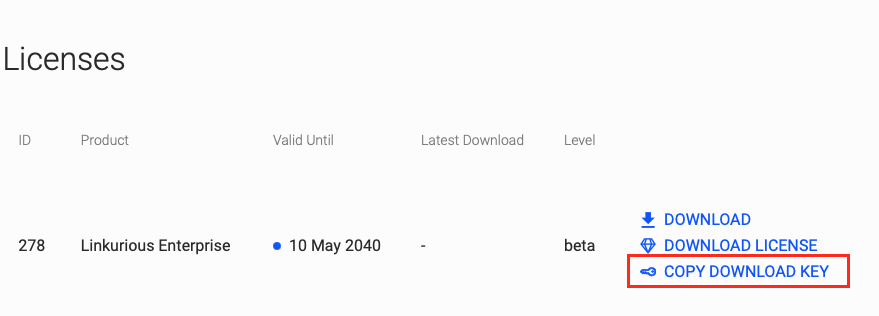
Step 2: Download center credentials
In the second step, you are prompted to provide the necessary credentials that allow Azure to download the application docker image from Linkurious Enterprise’s download center.
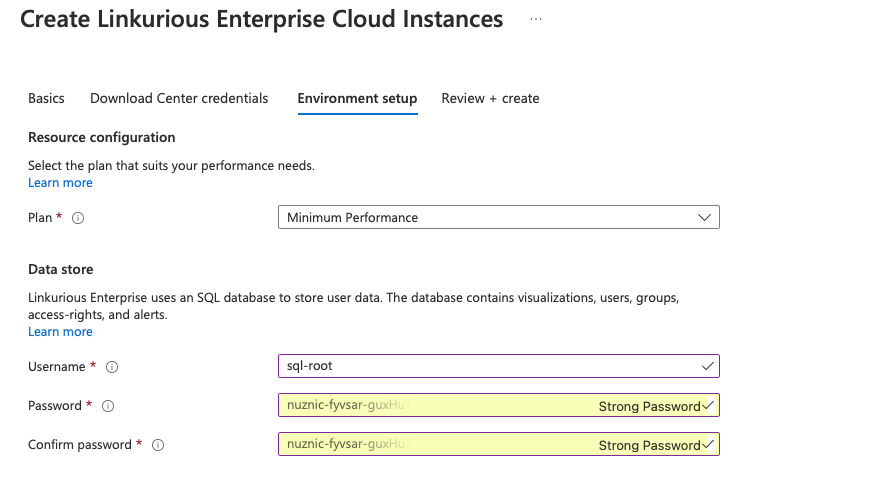
Step 3: Environment setup
In the third step, you select the hosting plan for the deployment of Linkurious Enterprise. This establishes the hardware characteristics of the environment on which the application will execute. You also provide new credentials to secure the sql database where Linkurious Enterprise stores the visualizations and all other user assets.
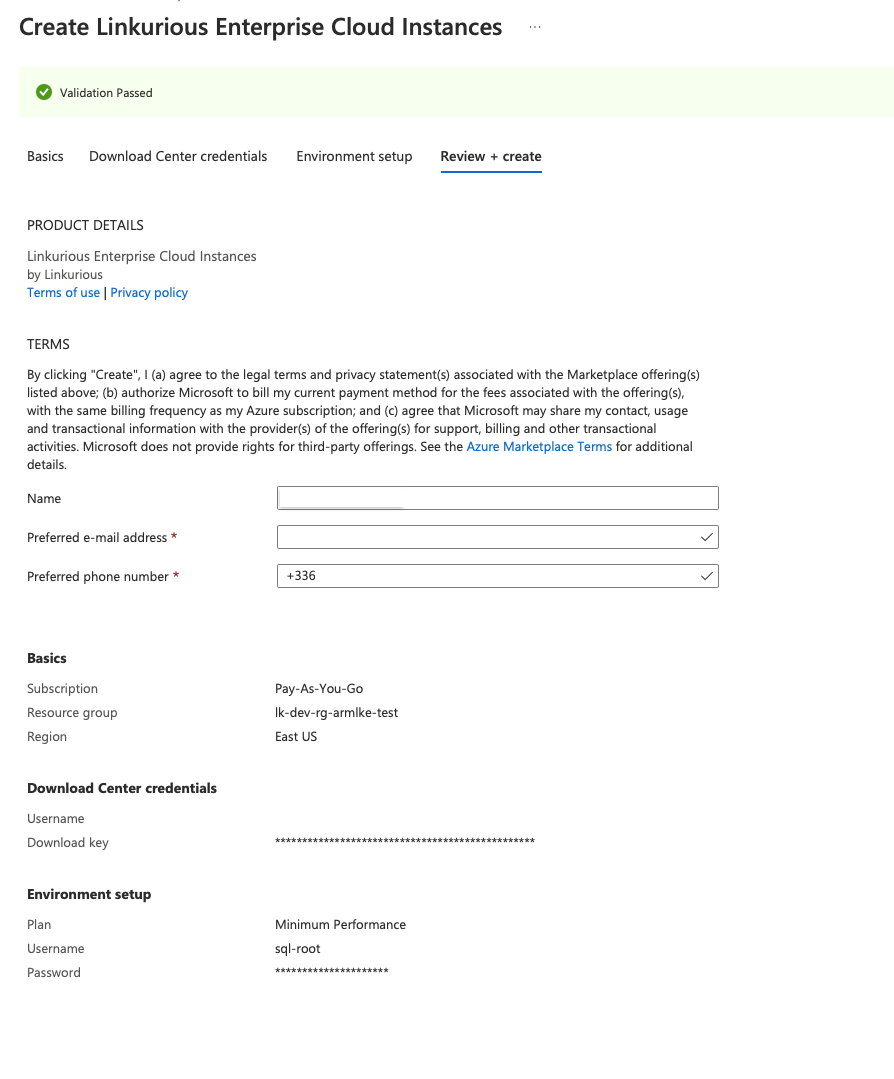
Step 4: Review and create
In this step, you can review your choices, agree to terms and conditions and start deployment by clicking the “create” button.
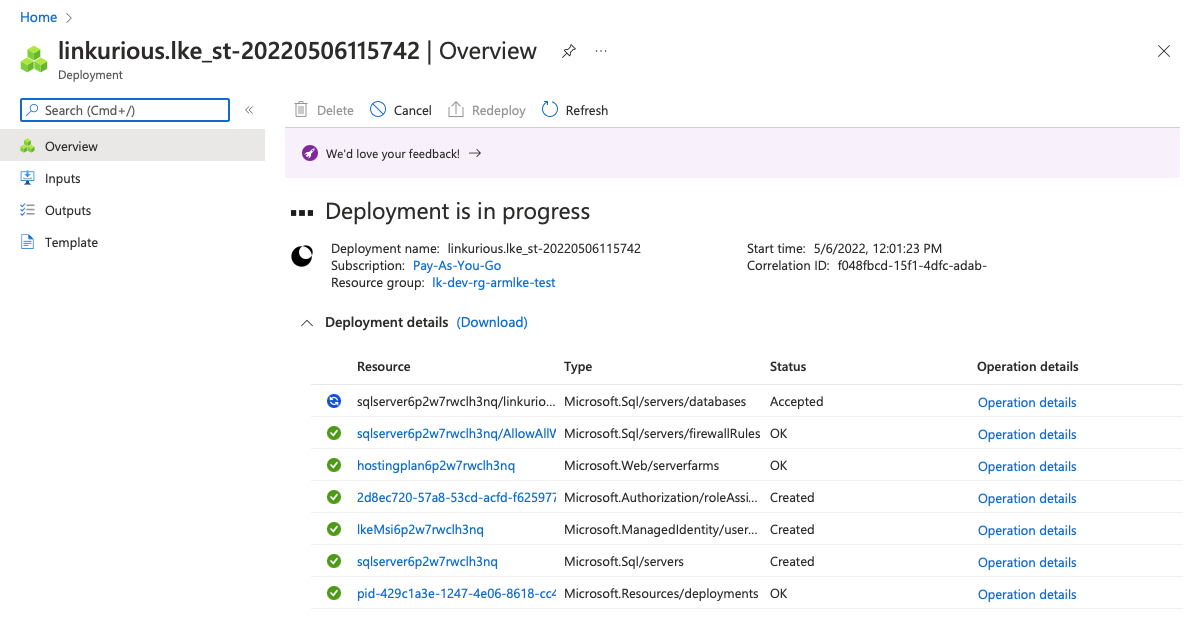
Step 5: Deployment
Your deployment starts and will take a few minutes.
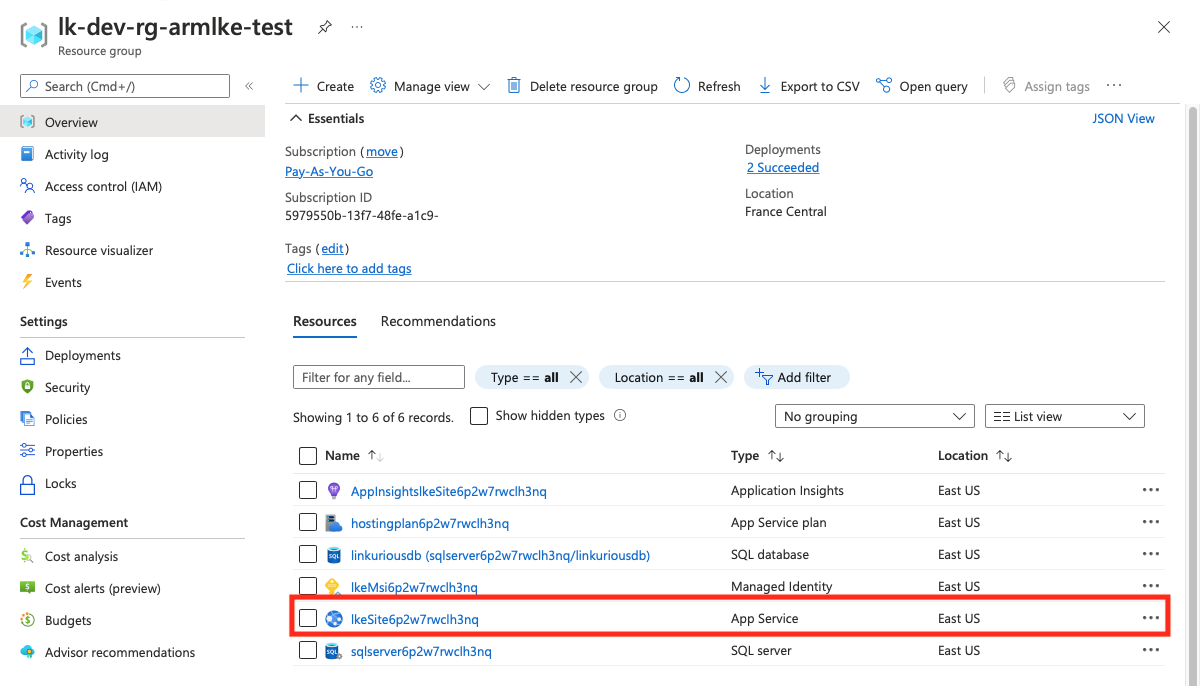
Once the deployment is completed, you can select Linkurious Enterprise App service in the resource group overview page and click on browse to open the application.
When you access Linkurious Enterprise for the first time, you will be prompted to upload a license and create the first administrator account.
