

Appearance
Ogma + Svelte/Vite
For the integration with Svelte, we used the recommended Svelte + TS + Vite template. It helped us to bootstrap a Svelte 5 application very quickly, with TypeScript support out of the box.
Unfortunately, you cannot start right away from an online playground like StackBlitz, because the Ogma package is distributed through our private registry rather than the public npm. Follow the installation guide to set up access, then run npm install @linkurious/ogma inside the template. From there we add a sample Ogma.svelte component that reads a shared counter state and adds nodes as you click on the "Increment" button, and a Tooltip.svelte component that is rendered inside an Ogma layer.
For that we will have to use some special Svelte component tricks:
- We need to implement lazy initialization of Ogma.
- We isolate the component so that you can control it from the outside using shared state.
- We reuse a regular Svelte component as a tooltip by mounting it into an Ogma layer.
Ogma component
We add a new component in src/lib/Ogma.svelte, that would create the Ogma container and interact with the rest of the UI.
First, lets add the container and styling. Note the position: relative — it lets us position layers (like the tooltip below) inside the container:
html
<script lang="ts"></script>
<div id="container"></div>
<style>
  #container {
    position: relative;
    width: 400px;
    height: 400px;
    margin: auto;
    border: 1px solid #ccc;
  }
</style>
That would add the <div> element to the DOM, and adds styles to it. Now we need to initialize Ogma inside the <div> element in a lazy manner.
For that we will be using Svelte's use:action directive.
ts
import Ogma from '@linkurious/ogma';

// action
function setup(node: HTMLDivElement) {
  const ogma = new Ogma({
    container: node,
    graph: {
      nodes: [{ id: 0 }],
      edges: []
    }
  });
  // add styles
  ogma.styles.addNodeRule({
    text: {
      content: n => `${n.getId()}`,
      position: 'center',
      color: 'white'
    }
  });
  return {
    destroy() {
      // kill ogma instance when the container is removed from DOM
      return ogma.destroy();
    }
  };
}
And when we connect it to the template, we just need to use it as an action:
html
<div id="container" use:setup></div>This way when the container is mounted, it will call the action function setup and pass the <div> element as a parameter. This is where we instantiate Ogma and add styles to it. It returns the destroy hook where we can take care of the destruction of the Ogma instance.
Connecting the component to the state
For this example we will be using the simplest possible state, just a counter. Svelte has a built-in way to share state between components. Let's declare the state in the src/lib/state.ts file:
ts
import { writable } from 'svelte/store';

// A tiny shared store: the number of nodes currently in the graph.
export const count = writable(1);

export function increment() {
  count.update(value => value + 1);
}
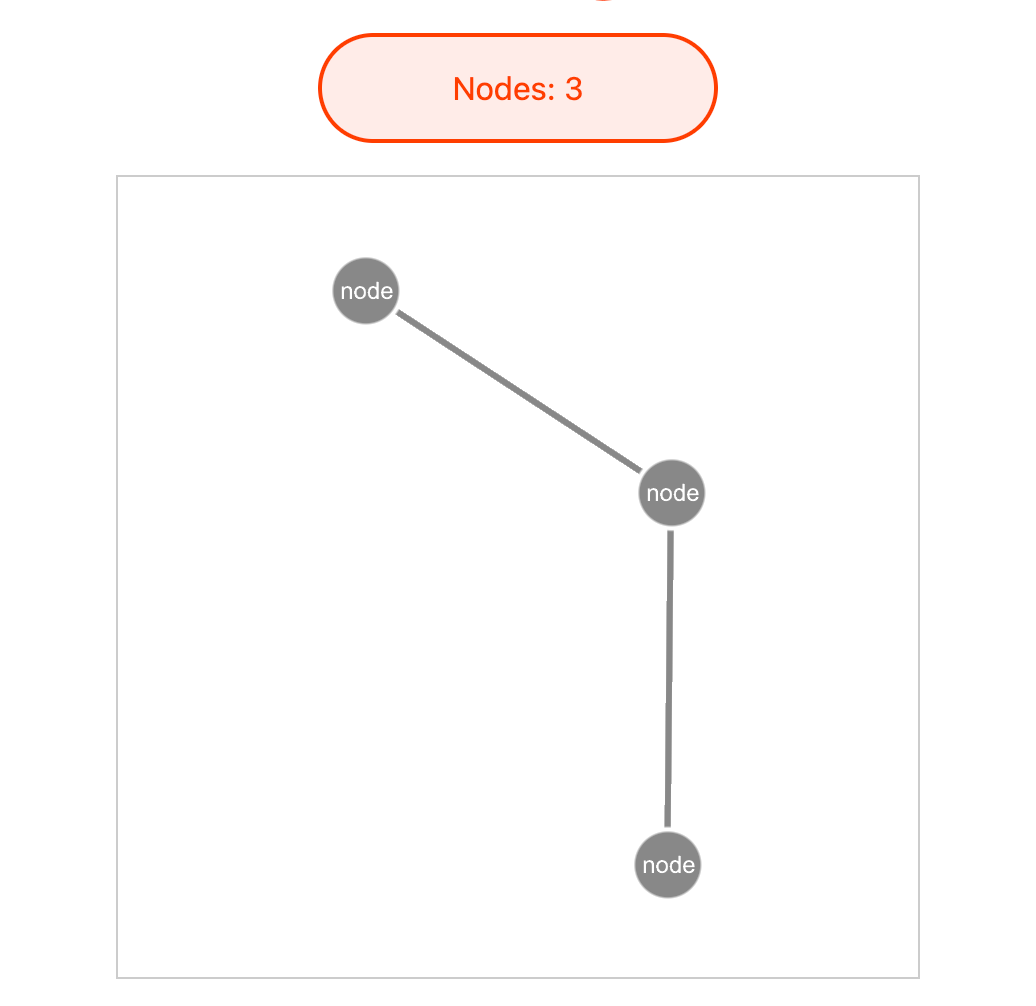
Here we expose the counter state and the function to increment it. We will use this counter to create nodes in the graph. A button in the UI will increment the counter and Ogma component will be notified and create a new node.
In the button component, we will use the count state to show how many nodes are in the graph and the increment function to increment the counter. Note the Svelte 5 onclick event attribute (in Svelte 4 this used to be on:click):
html
<script lang="ts">
  import { count, increment } from './state';
</script>

<button onclick={increment}>Nodes: {$count}</button>
Let's now use the counter state in the Ogma component to create nodes. For that, first we need to set the count as a dependency of the Ogma component action.
html
<script lang="ts">
  import { count } from './state'
  import Ogma from '@linkurious/ogma';

  // action
  function setup (node: HTMLDivElement, nodeCount: number) {
    ...
    return {
      update(nextCount: number) {
        return ogma.addGraph({
          nodes: [{ id: nextCount }],
          edges: [{ source: 0, target: nextCount }]
        }).then(() => ogma.layouts.force({ locate: true }));
      },
      destroy() {
        ...
      }
    }
  }
</script>
<!-- pass the count as a dependency -->
<div id="container" use:setup={$count}></div>
Svelte calls the action's update method every time the parameter ($count) changes, so each click adds a node and re-runs the layout.
A tooltip rendered inside an Ogma layer
A great way to reuse the framework you already know is to render Svelte components inside the graph. Ogma layers are plain DOM elements overlaid on top of the canvas, so we can mount any Svelte component into one and drive it with reactive state.
Let's create a small src/lib/Tooltip.svelte component. It is a completely normal component — it does not know anything about Ogma, it just renders whatever props it is given:
html
<script lang="ts">
  let {
    id = null,
    degree = 0,
    x = 0,
    y = 0,
    visible = false
  }: {
    id?: string | number | null;
    degree?: number;
    x?: number;
    y?: number;
    visible?: boolean;
  } = $props();
</script>

{#if visible && id !== null}
  <div class="tooltip" style="left: {x}px; top: {y}px;">
    <strong>Node {id}</strong>
    <span>{degree} neighbour{degree === 1 ? '' : 's'}</span>
  </div>
{/if}

<style>
  .tooltip {
    position: absolute;
    transform: translate(-50%, calc(-100% - 12px));
    padding: 6px 10px;
    border-radius: 6px;
    background: #1b1b1f;
    color: #fff;
    font-size: 12px;
    white-space: nowrap;
    pointer-events: none;
  }
  .tooltip span {
    display: block;
    opacity: 0.7;
  }
</style>
Back in the setup action, we create a reactive $state object, add an Ogma layer and mount the tooltip into it. Then we update the reactive state on the mouseover / mouseout graph events — mutating the state re-renders the Svelte component:
ts
import { mount, unmount } from 'svelte';
import Tooltip from './Tooltip.svelte';

function setup(node: HTMLDivElement, nodeCount: number) {
  const ogma = new Ogma({ container: node, graph: { nodes: [{ id: 0 }], edges: [] } });

  // reactive state shared with the mounted tooltip component
  const tooltip = $state({ id: null, degree: 0, x: 0, y: 0, visible: false });

  // add a custom layer and render the Svelte component into it
  const layer = ogma.layers.addLayer(document.createElement('div'));
  const tooltipApp = mount(Tooltip, { target: layer.element, props: tooltip });

  ogma.events
    .on('mouseover', ({ target }) => {
      if (!target || !target.isNode) return;
      const { x, y } = ogma.view.graphToScreenCoordinates(target.getPosition());
      tooltip.id = target.getId();
      tooltip.degree = target.getDegree();
      tooltip.x = x;
      tooltip.y = y;
      tooltip.visible = true;
    })
    .on('mouseout', ({ target }) => {
      if (target && target.isNode) tooltip.visible = false;
    });

  return {
    update(nextCount: number) {
      return ogma
        .addGraph({
          nodes: [{ id: nextCount }],
          edges: [{ source: 0, target: nextCount }]
        })
        .then(() => ogma.layouts.force({ locate: true }));
    },
    destroy() {
      unmount(tooltipApp);
      return ogma.destroy();
    }
  };
}
We convert the hovered node's graph coordinates to screen coordinates with ogma.view.graphToScreenCoordinates so the tooltip lines up with the node, and we call unmount in destroy to clean the component up together with the Ogma instance.
And that's it: click the button to add nodes, and hover any node to see the Svelte tooltip.
You can download the source code of the Svelte app here.